
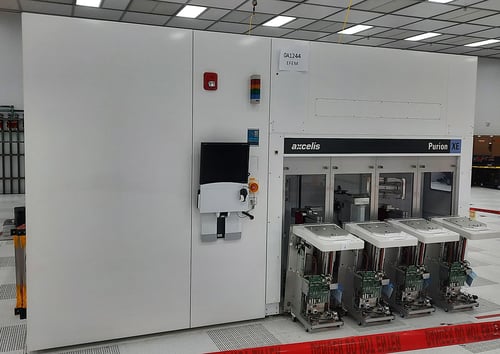


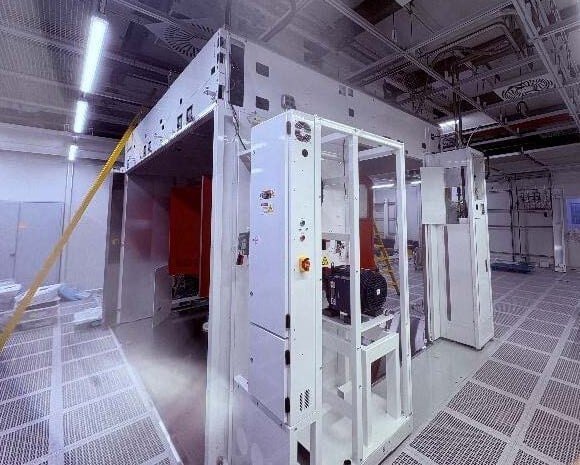
From Cleanroom to Crate: Preparing a Purion Ion Implanter for Transport
Specialist ion implanter deinstalled and prepared for transport. Delicate handling protected a high-value piece of equipment. Project managed to...
6 min read
At IES, we love a challenge. In fact, the more complex the project is, the better.
Which is why we love working with complex semiconductor equipment—and why our clients keep coming to our experts to handle their relocation projects.
Our recent semiconductor success story begins in Portland, Oregon, also known as “Silicon Forest.” Our client is a global leader in designing and manufacturing analogue, mixed-signal sensors and DSP integrated circuits (Digital Signal Processors).
Last year, the company announced it would invest €100 million in its new facility in Europe, which would become its collaboration hub for R&D. As part of this, it needed to move several ion-implanter tools from its Portland facility overseas to the new European fab.
Our role was to safely disassemble the tools in the US and then put them back together once they reached their new homes in Europe. But complex tools like ion implanters come with their fair share of challenges—each of which our experts had the knowledge and experience to handle.
In this article, we're going to focus in on just one of the Ion implanter tools and run you through how we successfully completed the entire de-installation, rigging and reassembly process.

We began the project in December 2022, when our team flew out to our client’s fab in Portland, to begin the shut-down and decontamination process.
Our hand-selected team consisted of a lead with 20 years of related experience and three other support engineers with an additional 50 years of installation and assembly, rigging and field service experience between them.
Before starting, we worked closely with the client’s implant project team to properly induct our installation engineers for fab access and make arrangements for their transportation and lodging.
Our lead installation engineer started with a walkaround of the still-running tool. Our client's project manager, field service engineers (FSEs) and riggers also attended to verify the tool was correctly shut down.
This process included determining a date and time frame for project start/finish that is scheduled into production and an exit strategy for module moving with the local rigger’s input.
We purged the gas lines, drained the waterlines, regenerated the cryo-pumps and turned the power off. Once power-off was verified, our team could get to work…
One of the key challenges of disassembling and relocating tools like ion implanters internationally is that, over time, they become saturated with extremely hazardous materials like phosphorous, arsenic and boron. And the particular ion implanter tools we were working with had close to 30 years of service life.
It’s also a requirement to completely decontaminate contaminated tools internally and externally and scrub them back to bare metal to ship them safely over US and European borders.
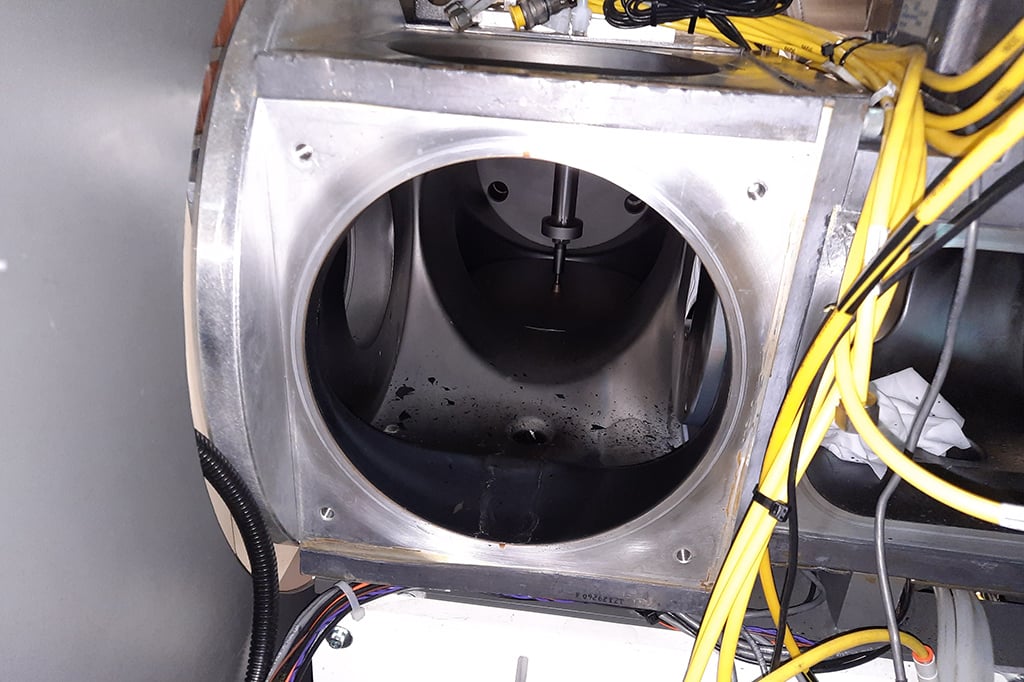
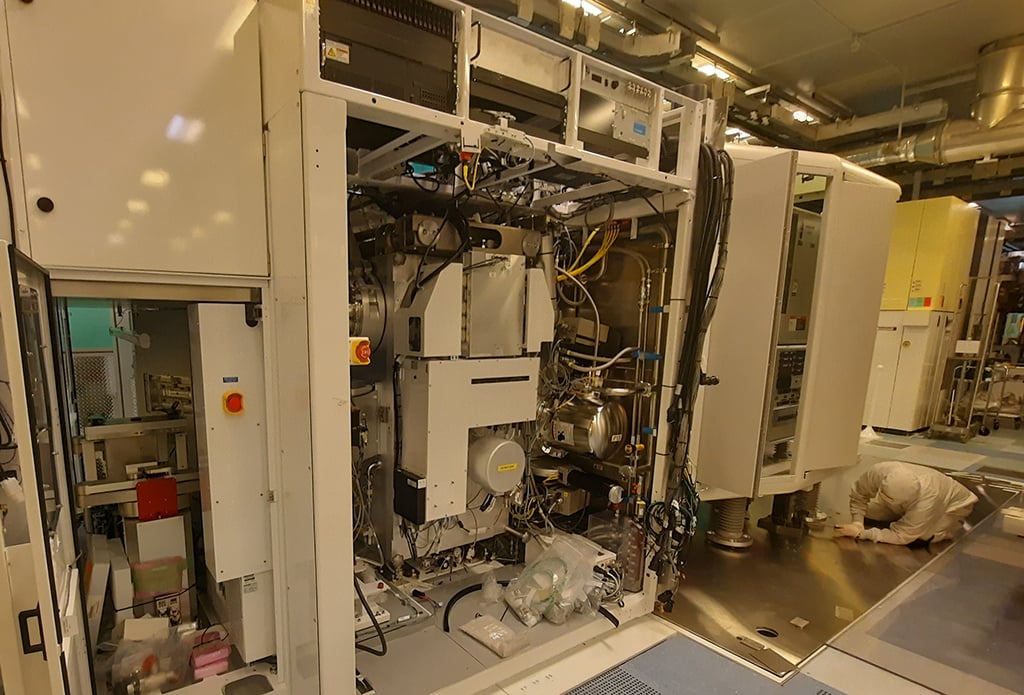
To start the process, two of our support engineers started on the process chamber and the immediate beamline path connected to it. While our lead installation engineer and our third support engineer began pulling apart the rest of the beamline path to the source chamber. They then removed and replaced the graphite components, O-rings and worn metals.
Our team then started removing smaller assemblies so we could send them off to an external vendor for cleaning. Some of these components, such as large cryopumps and cryo-valves, weighed over 100kgs and were attached in difficult-to-reach areas. This meant these would require special care and handling during removal to prevent damage or injury.
Additionally, liquid versions of toxic chemicals might have still been present in cryopump housings and exhaust tubes. Of particular concern was Hydrofluoric acid—a material that looks, smells, and feels like water but causes serious chemical burns several hours later.
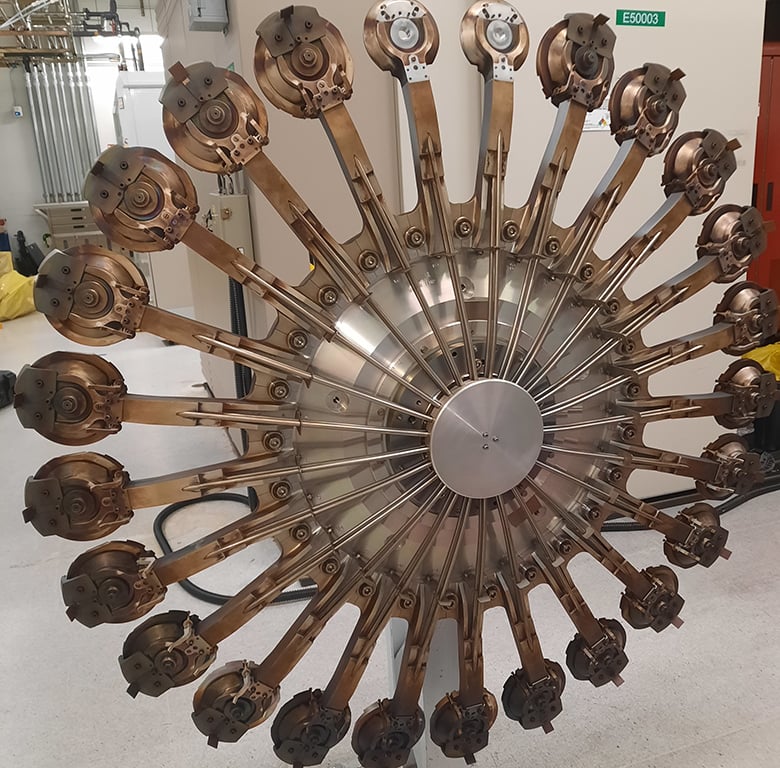
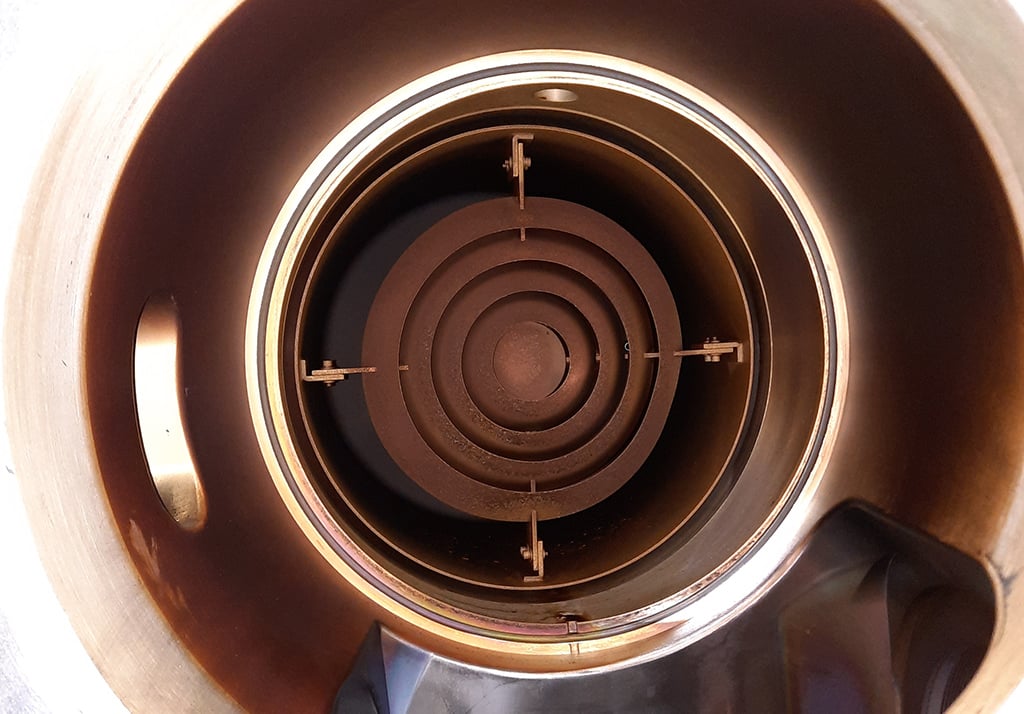
Once our team had removed the subassemblies, we sent them out for decontamination in bulk and began the arduous task of manually cleaning the beamline tunnels and process chamber.
We began by using Deionized water (DI) and cleanroom cloths which bond to some of these materials. We then used diamond-encrusted pads to scrub the chamber back to bare metal and polished with fine-scoring pads. Lastly, we performed a final wipe-down with DI and finished the job with Isopropyl Alcohol (IPA).
After we’d completed clean-up, our lead installation engineer performed a swipe test on critical points of the tool, which we then sent to a certified third-party laboratory for analysis. By this time, sub-assemblies had arrived cleaned and were ready for a full beamline rebuild.
We reassembled the beamlines up to each module frame and left them unconnected for the next stage of module separation. Cryopumps, on the other hand, require careful disassembly and longer turnaround times. So we sent them directly to the European fab to meet up with the de-installed tool.
Before we moved on to de-installation, we confirmed that lab results complied with industry guidelines.
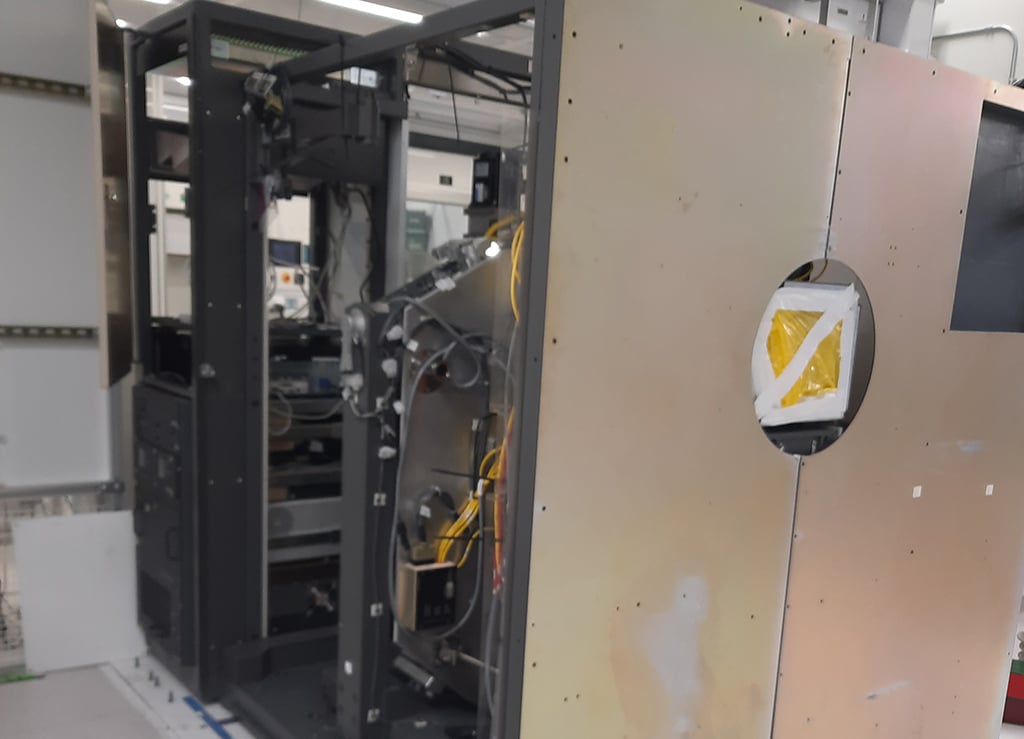
Next, we began the disassembly and started separating the modules.
Because of their size, these tools need to be broken down into several steel-framed modules—with some modules weighing over 7 tonnes.
And for each tool, there’s a very specific process that needs to be adhered to for de-installation. Small mistakes can cause massive problems, and dismantling a tool in the wrong way or order can cause significant delays, damage or injury.
Typically, the OEM will have a written guide for disassembly. But for legacy tools, many of the instructions have become lost in time. This isn’t a problem when you have a highly experienced team like ours, as we have deep knowledge and experience working with OEMs and disassembling complex tools.
Two engineers worked on removing and securing communication cables, power cables, vacuum lines and cooling lines between the end chamber module, front Power Distribution (PD) module and process chamber module.
While another provided logistic support with local staff to ensure missing or broken components were replaced or placed on order. He also fed the team with supplies to keep them moving and enrolled local staff into removing facilities items.
Our lead engineer focused on removing connections between the process chamber module, source module and main PD. After this, they followed up by locking down unsecured items and blocking off any exposed areas of the beamline.
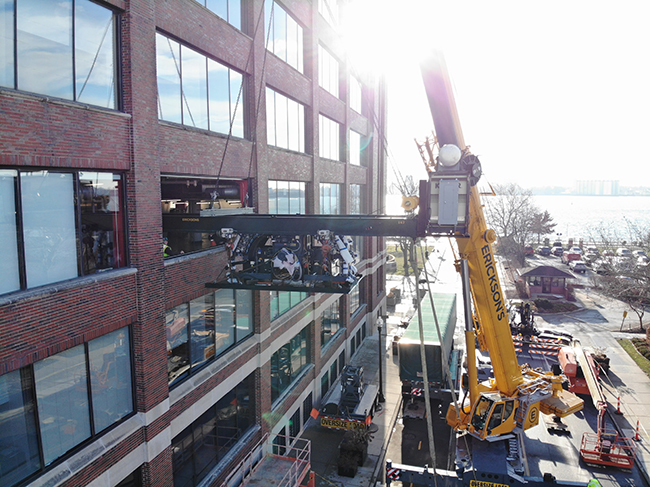
Once we’d completely separated the modules and removed the enclosures, our client’s riggers could begin removing modules from the fab to the warehouse.
While we weren’t contracted to help move the tool, our team stayed on-site to guide and support our client’s riggers and assist with determining a safe exit strategy in the confined spaces of the fab.
The process was a fluid movement of some engineers separating modules, while others assisted the riggers with removing lead panels and doors.
During packing, special handling and foams were used to protect the heavy yet soft lead-lined covers, doors, and roof, while protecting the engineers and riggers from injury. The modules were sealed and crated with anti-vibration pads and sensors to ensure safe transportation, and to make the client aware of shock loads upon receiving.
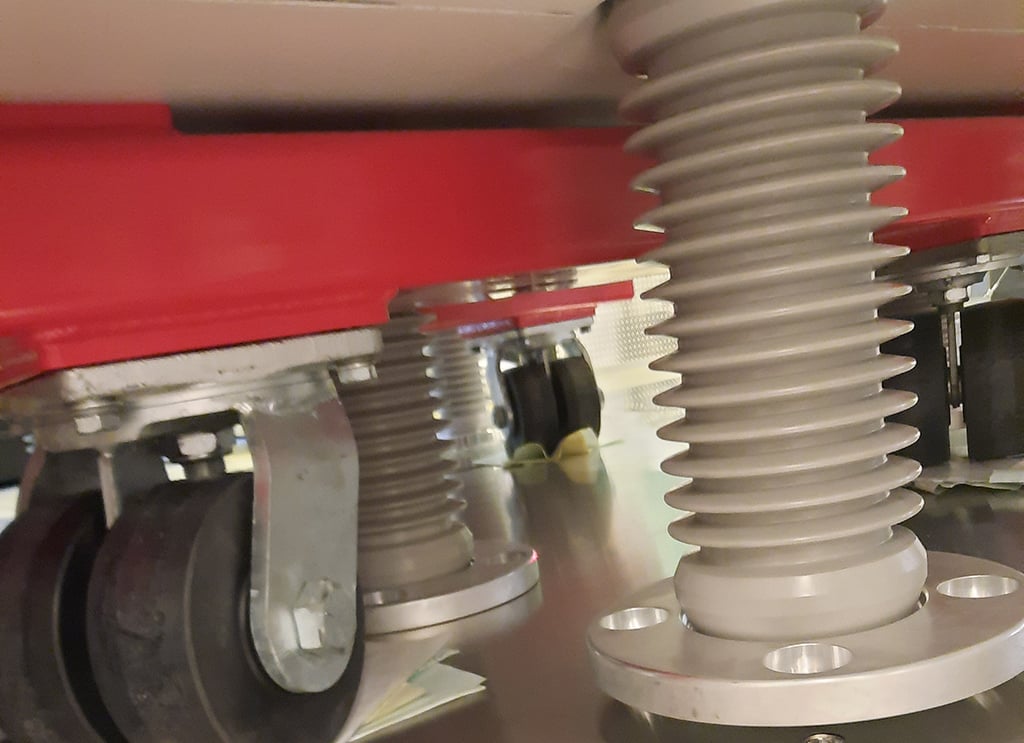
We’d manufactured bespoke shipping kits 3–4 months in advance and in accordance with OEM guidelines. This was essential because of the considerable weight and volume of the tool. And heavy load points were located at off-centre locations, which would’ve made moving impossible without specially-crafted kits.
So, after the tools were removed from the fab, our specially-fit shipping kit was placed under the process chamber module to enable safe lifting and transport to the offsite warehouse for further crating.
At this point, our job was done. All we could do was wait at the new fab in Europe to see how everything arrived and prepare the offloading and entry sequence for installation into the new fab.
We were pleased to hear that the dismantled tool made the long trip to Europe without event—all thanks to our bespoke shipping kit and expert support. The next step was to bolt up the equipment.
The bolt-up process is similar to de-installation—though with little cleaning required (the exception being cleaning and lubricating O-rings and their sealing surfaces).
Our lead rigger began the process by assessing the path we’d use for moving and the types of skates or lifts we’d need. As part of this, we also opened and assessed the arrived crates. Our lead rigger opted for forklifts to uncrate modules for transportation to the fab, followed by heavy skates for in-fab moving.
The first stage was to pallet jack in and set the led flooring, followed by uncrating and rolling in the rearmost source chamber module first and in sequence to the end station module last. We also laid acrylic sheets along the entire path of each module to protect the fab flooring.
High-energy tasks like these can take a few days from uncrating to final module placement on the floor.
After we placed the modules, we then set their heights, locked together where needed and set the beamline using alignment tools.
The bolt-up process generally takes a crew of between four to six riggers and an equal number of installation engineers. While a group of our installers began connecting cables, wires and lines between modules, another began installing the roof, facilities and doors.

To finish off, our final test engineer started validating power-up, achieving vacuum (without leaks) and beginning the process of final validation. The final validation test involved setting the tool to high levels of function to verify it could meet its maximum parameters.
This was another successful project for IES, thanks to our top-notch crews and office staff, as well as clear communication and support from our client.
Throughout the project, we decontaminated the tool to a like-new condition, transported it damage-free, and installed it at its new home without damaging flooring in the fab. Now, the tool is ready to be put into use and help our client support output production.
Ion implanters might be extremely delicate and complex tools, but with a team that has the right knowledge and experience, you can relocate them safely.
Since 1991, we’ve been moving and installing complex semiconductor tools (from implanters to lithography) in fabs all over the world.

Specialist ion implanter deinstalled and prepared for transport. Delicate handling protected a high-value piece of equipment. Project managed to...
Plessey Semiconductors is a long-established electronics company, currently at the forefront of microLED display technology for AR/MR applications ...
Solved a major access challenge for a large press installation. Required specialist lifting and detailed planning. Delivered a first-of-its-kind...